
This is an admin only feature.
Multiplayer Microsimulations now have a dedicated studio — and for the first time you can create/build a multiplayer scenario from scratch. It shares the layout and feel of the single-player builder, and walks you through five steps.
Before you start:
-
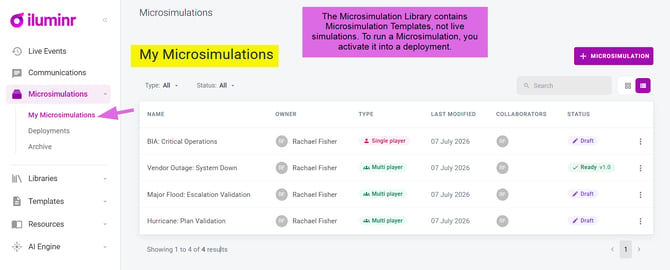
You build in the Microsimulation library (Microsimulations → My Microsimulations).
- A simulation stays in Draft until you mark it Ready to deploy — only then can it be added to a deployment.
- Collaborators and permissions
- How can I access the Multiplayer Microsimulation builder?
- How can I create new content?
- How can I utilise the configure tab for branding?
Collaborators & permissions
Invite people to work on a simulation with you:
- Contributors can edit.
- Reviewers can view only.
You can invite individuals, roles, or teams.
How can I access the Multiplayer Simulation Studio?
- Login to your iluminr account.
- In the navigation menu, expand Microsimulations.
- Select My Microsimulations.
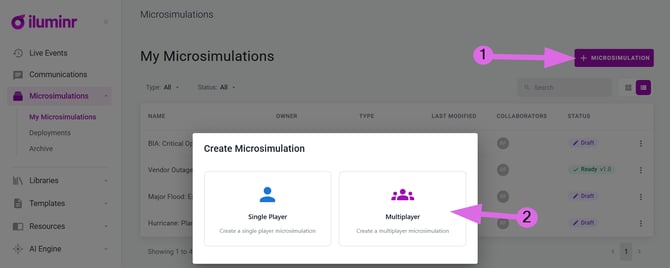
- To create a new Multiplayer Microsimulation click the + MICROSIMULATIONS button, then select Multiplayer.
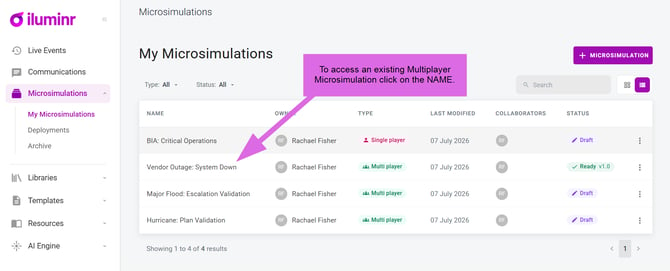
- To access an existing Multiplayer Microsimulation click on the NAME.
How can I create new content?
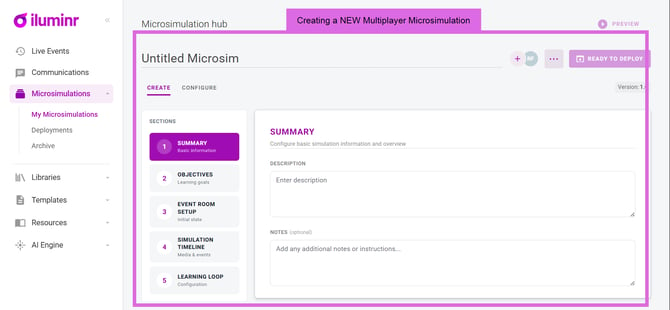
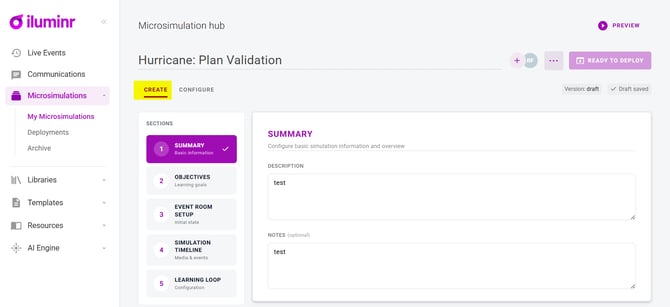
Use the CREATE section to build the:
- Summary — name the simulation, add a description, and any notes for your team.
- Objectives — your core learning objectives. We recommend around three — the report measures success against them, so keep them focused.
- Event room setup — multiplayer runs over an event room. Optionally pre-load information board items, task board items, impacted sites, and active playbooks so they're in place the moment the session starts. Leave it empty if you'd rather build the picture live. (Event rooms get a bigger overhaul in a later update. )
- Simulation timeline (injects) — the heart of the build. Add injects in the order they'll appear in the Facilitator Console. The types:
- Media — video, image, audio, PDF, or a document, with a link. Preview it right in the timeline.
- Scenario update — a fact, assumption, or issue. When the facilitator releases it, it posts to the information board automatically as collected information, so you don't duplicate it.
- Discussion guide — the tasks or questions you want the group to work through. Replaces pre-loading task-board items.
- Pulse check — coming in July — live questions (multiple choice, free text) participants answer in the moment.
- Learning loop — build a learning loop for the simulation. Question types: free text, multiple choice, and ratings. Delivered by link or QR code at the end, for after-action feedback.
- Note: right now each learning loop is built per simulation — there are no reusable templates yet. Learning loop templates are coming in a later update.
Example of creating a new Multiplayer Microsimulation:
Example of managing an existing Single Player Microsimulation:
How can I utilise the configure tab for branding?
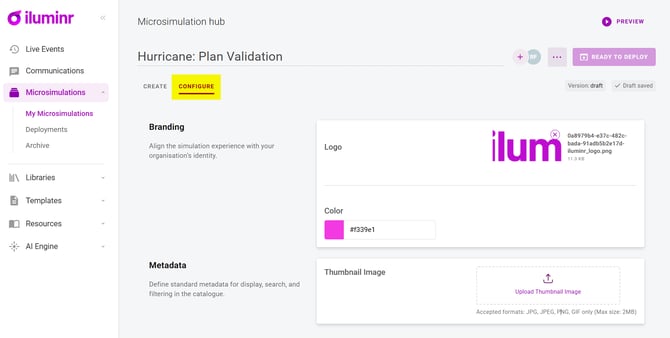
By default, your organisation's branding — the logo and colours set in org settings — applies to every simulation. You can override it per simulation: set a logo and/or a colour scheme at the simulation level and it takes precedence over the org defaults. You can also add a thumbnail for the simulation's card.
Align the simulation experience with your organisation’s identity by uploading your company logo (Accepted formats: JPG, JPEG, PNG, GIF (Max size: 2MB)) and selecting your company colour with HEX, RGB or the eye dropper.
Related Articles:
Need more assistance? Submit a support ticket