Learn how to manage a Microsimulation (for admin users)
Use the table of contents below to jump to the relevant section:
- Select the Microsimulation
- Duplicate the Microsimulation
- Preview the Microsimulation
- Preview the Learning Loop/Feedback
- Manage the Objectives, and Media Asset
- Manage the Participants and Facilitator
- Manage the Learning Loop
- Prepare Facilitator and schedule Microsimulation
- Complete a Microsimulation as an Admin User (Reporting)
Select the Microsimulation
Browse the Microsimulation Catalogue to find a scenario that best fits your use case. Once you've selected a Microsimulation, reach out to your iluminr Customer Success Manager (CSM) with the name or ID of the scenario you'd like to use. Your CSM will import the Microsimulation into your organisation’s iluminr account and schedule a preview session to walk you through the experience — highlighting the 80% prebuilt content and the 20% available for customisation.
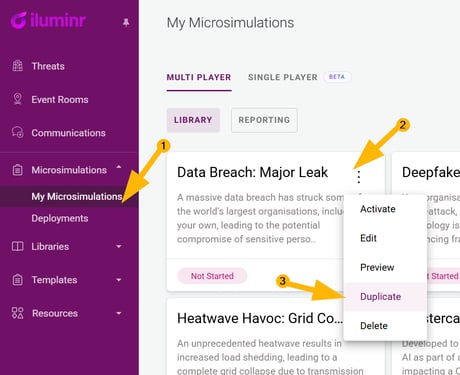
Duplicate the Microsimulation
-
Log in with your iluminr credentials.
- From the left-hand menu, click Microsimulations to open the Microsimulation Library.
-
Find the Microsimulation you want to configure.
-
Click the three-dot menu (⋮) and select Duplicate.
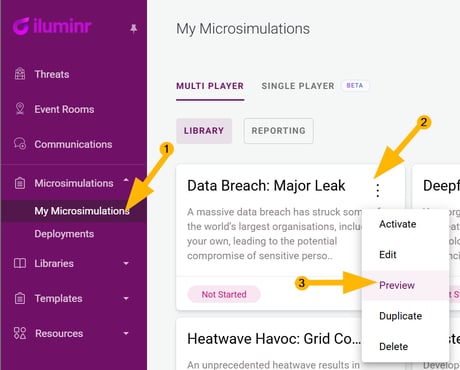
Preview the Microsimulation
-
Log in with your iluminr credentials.
- From the left-hand menu, click Microsimulations to open the Microsimulation Library.
-
Find the Microsimulation you want to configure.
-
Click the three-dot menu (⋮) and select Preview.
-
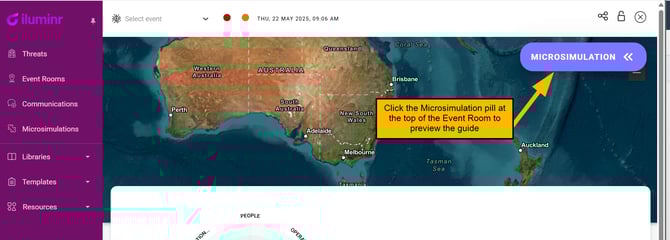
You’ll be taken to the Event Room, which simulates the participant experience.
-
Click the Microsimulation pill at the top of the Event Room to preview the guide.
- Click on Intro to review the learning objectives (these can be edited later via the Library)

-
Watch the scenario video (note: this is a generic video designed to build realism)
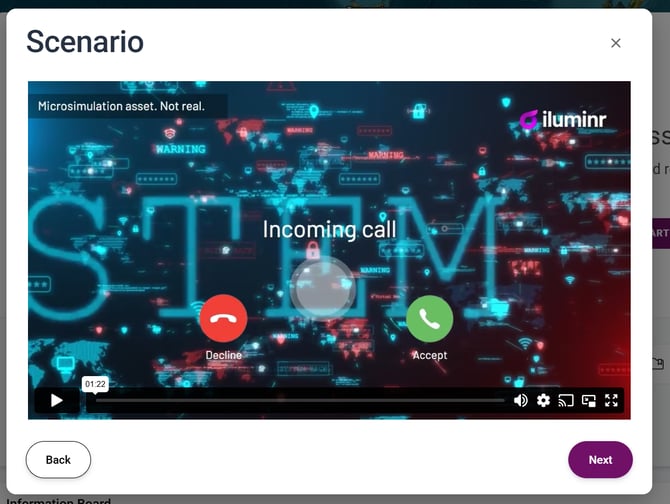
- Click Next in the pop-ups to continue to preview the Microsimulation media asset.
-
Read the Information Board and Event Tasks Board, noting changes to any placeholders (e.g.
[INSERT CRITICAL VENDOR HERE]) that need to be updated.
🎯 Consider how the scenario/information, objectives, and activities/tasks apply to your participants, and adjust the severity or context of the scenario as needed.
Preview the Learning Loop
-
Log in with your iluminr credentials.
- From the left-hand menu, click Microsimulations to open the Microsimulation Library.
-
Find the Microsimulation you want to configure.
-
Click the three-dot menu (⋮) and select Preview.
-
You’ll be taken to the Event Room, which simulates the participant experience.
-
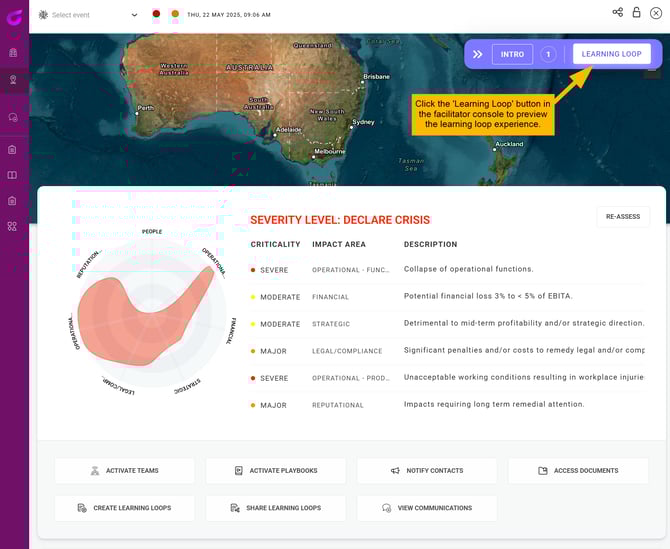
Click the Microsimulation pill at the top of the Event Room to preview the guide.
- Click the Learning Loop button to preview the Learning Loop as a participant. Learn more about the participant experience at: How do I participate in a Microsimulation as a Learner?
- preview where the QR Code toggle = N
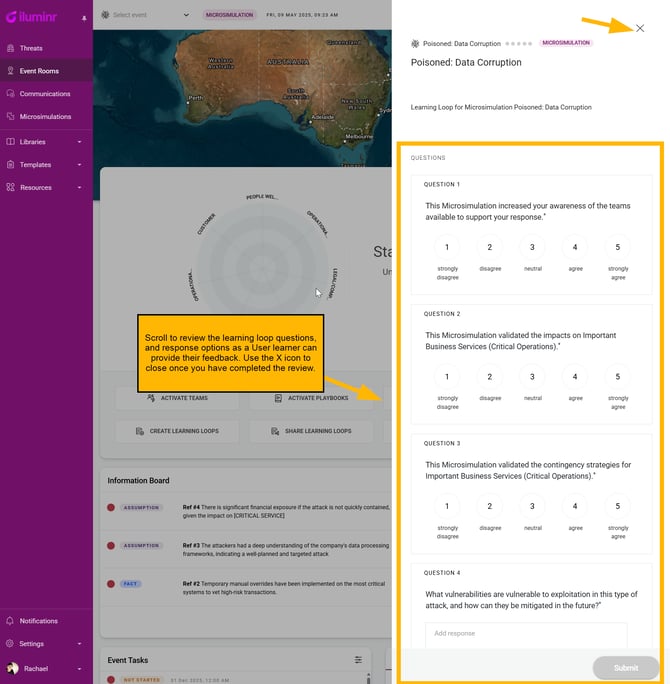
- Preview the QR Code experience where the QR Code toggle = Y. Participants scan the QR Code with their mobile device, and complete the learning lop questions as a learner.

Manage the Objectives
-
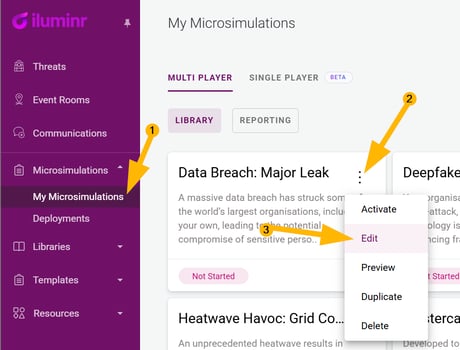
Return to the Microsimulation Library.
-
Find the Microsimulation you're editing.
-
Click the three-dot menu (⋮) and select Edit.
-
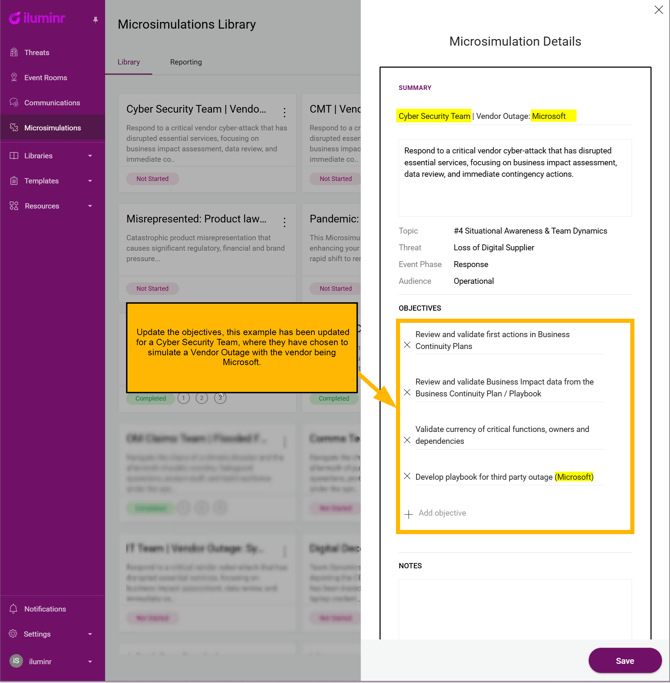
Scroll to the Objectives section. Add, edit, or delete objectives as needed.
🎯 Consider how the scenario/information, objectives, and activities/tasks apply to your participants, and adjust the severity or context of the scenario as needed.
Manage the Objectives, and Media Asset
-
And the Microsimulation you're editing.
-
Click the three-dot menu (⋮) and select Edit
-
Scroll to the Objectives section. Add, edit, or delete objectives as needed.
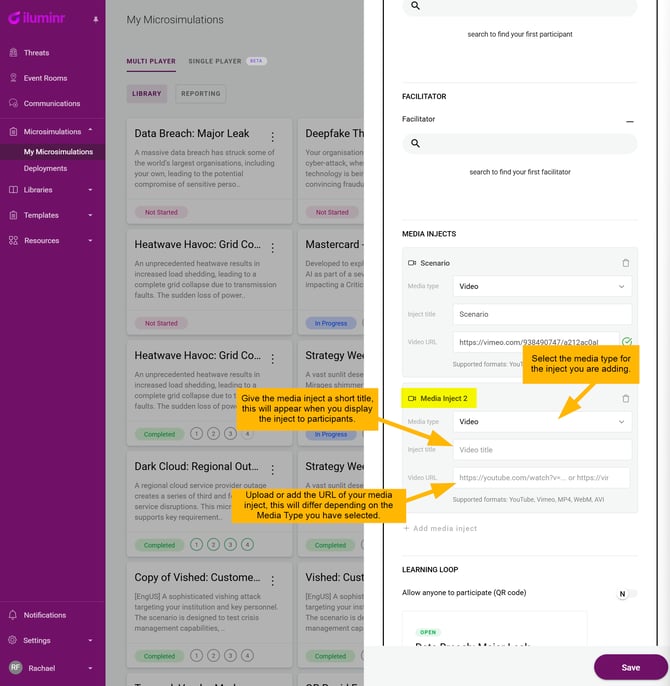
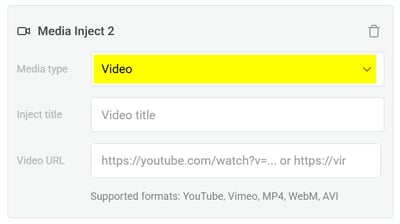
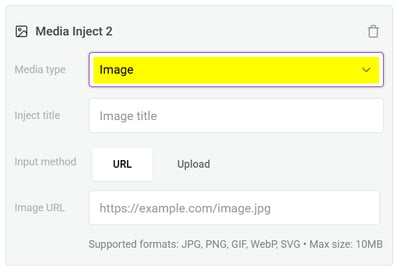
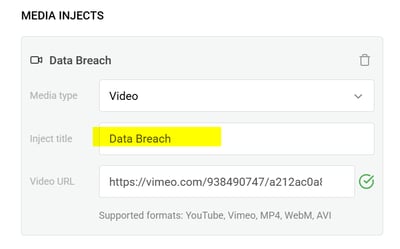
- Scroll to the Media Asset section. Add, edit, or delete media assets as needed.
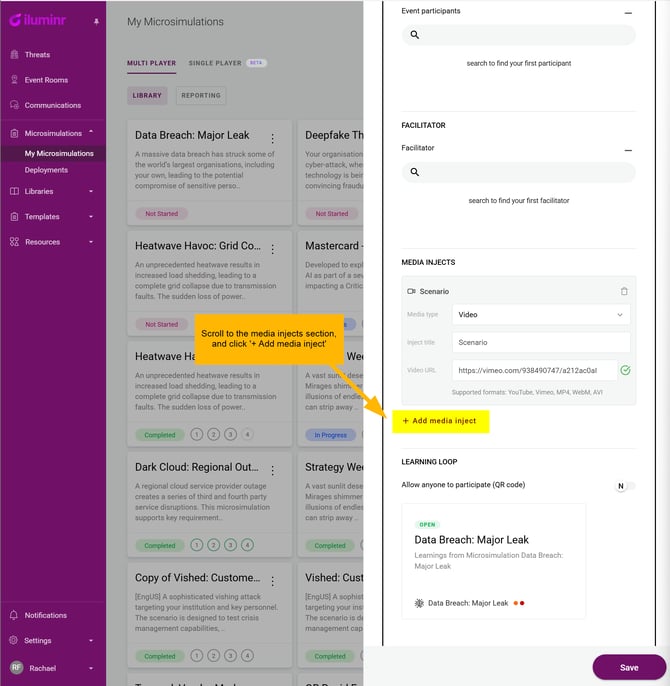

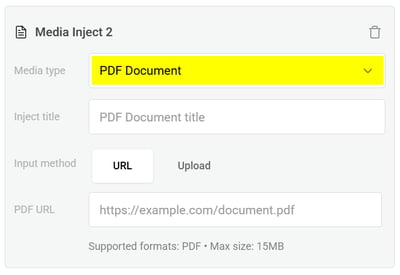
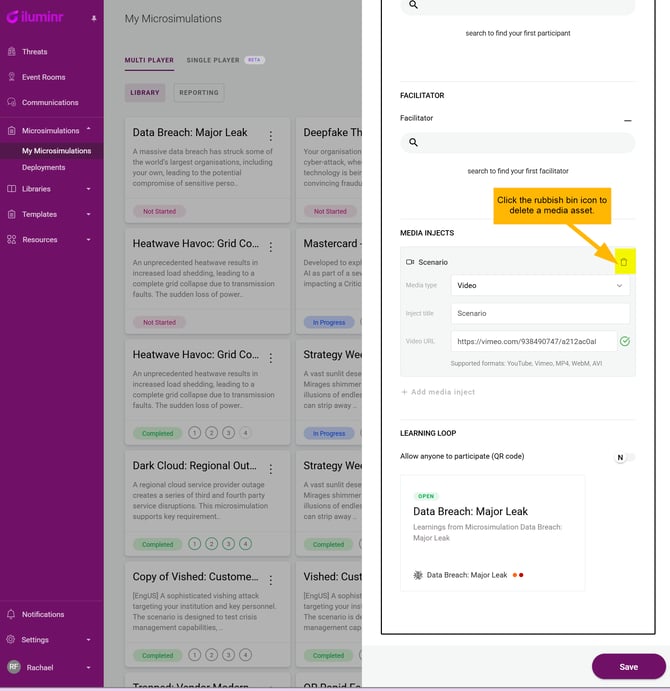
We encourage you to save the original media asset link, or duplicate the Microsimulation before you delete a media asset. This will allow you to preserve the original media asset. If you delete it by mistake, please contact Customer Support.
Manage the Participants and Facilitator
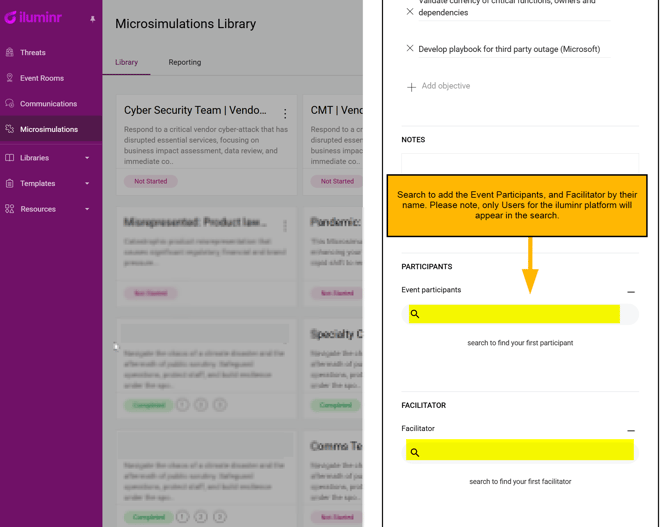
- Scroll to the Participants section. Use the search bar to add participants. Participants must be existing iluminr users (including learner-type users).
- Add a facilitator the same way, in the Facilitator section.
Manage the Learning Loop questions
-
Click the Learning Loop card to preview, edit, or add questions.
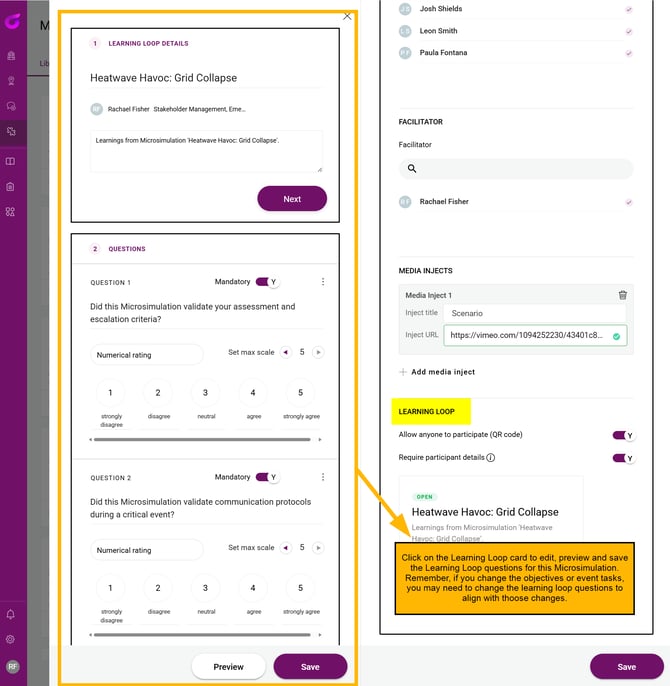
- Toggle Allow anyone to participate to enable QR code access (optional)
- Toggle Require participant details to make first name, last name, role and email mandatory (recommended for compliance purposes)

- Click Save at the bottom of the Microsimulation editor to confirm your changes.
Prepare Facilitator and schedule Microsimulation
Running the Microsimulation
- Schedule the 30-minute Microsimulation with the team.
- Leverage the Microsimulation Facilitation Pack for an overview of Microsimulations, email communication templates, a facilitation script, a facilitator run sheet and FAQs.
- Activate the Microsimulation in iluminr 15-minutes before the start of the Microsimulation.
- Participants will locate the Microsimulation by the Event Rooms module.
Related Articles:
- Get to know the Microsimulation Console
- Get to know iluminr Microsimulations
- How do I Complete a Microsimulation as an Admin User?
- How do I participate in a Microsimulation as a Learner?
Need assistance? Submit a support ticket